The secret to a calmer, more independent household isn’t more rules; it’s a smarter environment that acts as a silent teacher.
- Physical cues like low shelves and accessible storage are more effective at shaping behavior than constant verbal instructions.
- True safety comes from teaching competence (e.g., how to use stairs) rather than solely restricting access.
Recommendation: Start by redesigning one small area, like the entryway, to give your child the tools to manage their own belongings, and watch their confidence and independence grow.
The echo of “put your coat away,” “tidy your toys,” or “be careful” is a familiar soundtrack in many homes with young children. It’s a cycle of reminders that can leave parents feeling like broken records and children feeling nagged. We often try to solve this with rules, rewards, or repetition. We buy storage bins, create chore charts, and hope that one day, the message will finally stick. This approach, however, focuses on correcting behavior after the fact, rather than shaping it from the start.
What if the environment itself could do most of the teaching? What if the layout of your living room, the height of a hook, or the type of lighting could communicate expectations and empower your child more effectively than your words ever could? This is the core principle of a Montessori-inspired home. It’s not about achieving a specific minimalist or “beige” aesthetic, but about creating a responsive ecosystem where the physical space becomes a silent partner in parenting. It’s a shift from managing a child’s actions to designing a world that naturally guides them toward independence, responsibility, and a powerful sense of their own competence.
This guide moves beyond generic tips to explore the “why” behind these design choices. We will deconstruct how to create an environment that anticipates your child’s needs and fosters their abilities, turning everyday routines into opportunities for growth. From the entryway to the art corner, you will learn to see your home not just as a place to live, but as the most important tool you have for nurturing a capable, confident, and independent child.
This article will guide you through the practical application of this philosophy. We will explore the science behind why an organized environment works, then move through specific areas of the home, offering concrete strategies to foster self-reliance and reduce household chaos.
Summary: Designing a Home That Teaches Independence
- Why low shelves change behavior better than repeated verbal instructions?
- How to organize the hallway so a 3-year-old can dress themselves?
- Playroom or Living Room Corner: Which keeps the house tidier?
- The “Beige Room” mistake: When style prevents a child from feeling at home
- How to use lighting to calm a chaotic household in the evening?
- How to create a damage-proof art corner in a rental property?
- How to anchor heavy dressers in a rental without losing your deposit?
- How to Help Toddlers Stay Safe Around Stairs and Heavy Furniture?
Why low shelves change behavior better than repeated verbal instructions?
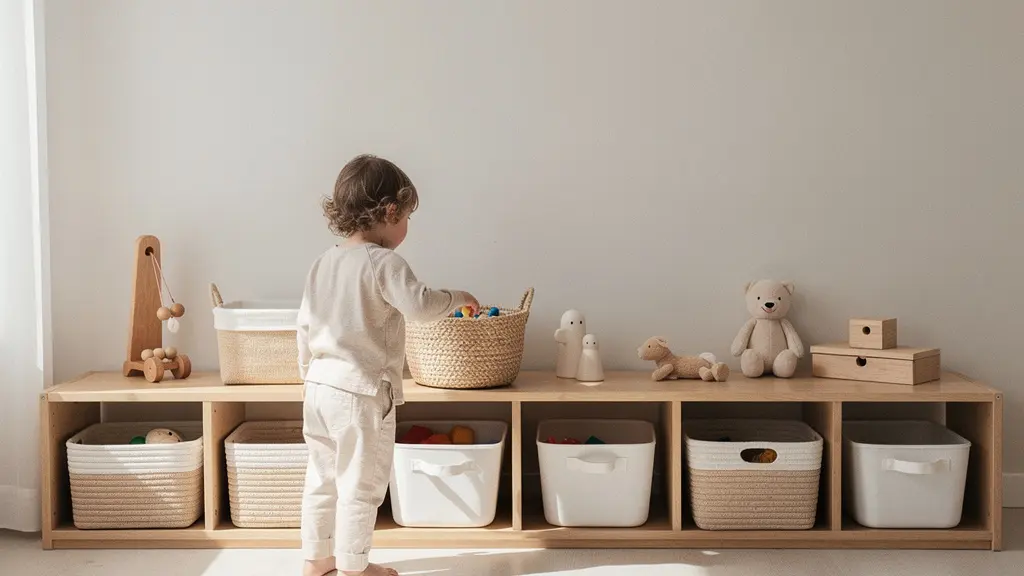
A low shelf is more than just a piece of furniture; it is a profound statement of trust and an instrument of behavioral change. When a child has to constantly ask for help to access their toys, it reinforces a pattern of dependency. Conversely, when their playthings are placed on accessible, open shelves, the environment sends a clear message: “This is for you. You are capable. You are in control.” This simple act of physical organization serves as a constant, non-verbal cue that is far more powerful than a parent’s repeated instruction to “go play.” It empowers them to make choices, initiate activities, and, crucially, learn to put things back where they belong. The shelf becomes a silent instructor, teaching organization and responsibility without a single word being spoken.
This isn’t just theory; it’s backed by observation and research. A study in a Finnish Montessori school noted that implementing low shelving systems led to significant improvements in children’s self-directed activity and task completion. The ability to independently reach for and return materials fostered a sense of ownership and competence. The environment itself did the heavy lifting of guiding behavior, freeing up educators to focus on deeper engagement rather than basic classroom management. The same principle applies at home, transforming the daily struggle over toy chaos into a seamless system of self-management.
Your Action Plan: Creating an Environment of Independence
- Install low shelves at your child’s eye level (around 24-30 inches high) in the main living and play areas.
- Use open baskets and clearly labeled (with pictures for non-readers) bins to organize materials by category, such as blocks, art supplies, or puzzles.
- Rotate toys and activities weekly, keeping only 6-8 options accessible at once to encourage deep engagement and prevent overwhelm.
- Create clear visual boundaries for play using small area rugs or painter’s tape on the floor to define specific activity zones.
- Establish a simple and consistent rule like “one activity out at a time” and make the cleanup routine a shared, practiced ritual.
How to organize the hallway so a 3-year-old can dress themselves?
The hallway or entryway is the first and last frontier of independence each day. For a three-year-old, a standard hallway is an environment built for giants, where hooks are unreachable and shoes disappear into a deep, dark closet. This setup guarantees they will need your help, often at the most rushed moments of the day. By redesigning the entryway with a child’s perspective in mind, you transform a daily point of friction into a moment of triumph. This is about creating a “launch pad” for independence where every necessary item is visible, accessible, and has a logical home.
The goal is to create a microcosm of organization that a small child can understand and maintain. This means a low bench for sitting while putting on shoes, a few hooks at their shoulder height for their coat and backpack, and a small, open shelf for the two or three pairs of shoes they wear most often. This isn’t just about tidiness; it’s about choreographing a sequence of actions they can master. The environment provides the script, and the child becomes the actor, performing the steps of getting ready without needing constant verbal cues. The pride they feel from saying “I did it myself!” is a powerful motivator that echoes through all other aspects of their development.
| Element | Traditional Setup | Independence-Focused Setup | Impact on Child |
|---|---|---|---|
| Coat Hooks | Adult height (60+ inches) | Child height (24-30 inches) | Can hang/retrieve coat independently |
| Shoe Storage | Closed cabinet or high shelf | Low open shelf with 2-3 pairs visible | Easy selection and cleanup |
| Bench/Seating | Adult-size or none | 10-12 inch high sturdy stool | Safe shoe putting-on process |
| Visual Aids | None | Picture sequence cards at eye level | Self-guided dressing routine |
| Storage Baskets | One large bin | Separate labeled bins for each item | Clear organization system |
Playroom or Living Room Corner: Which keeps the house tidier?
Parents often believe that dedicating a separate playroom is the key to containing the inevitable spread of toys. The reality, however, is that young children crave proximity to their caregivers. A play corner in the main living area often aligns better with their social needs. The debate over playroom versus play corner misses the point: tidiness is not about location, but about systems and expectations. A home stays tidier when children know where things belong and are empowered to participate in the cleanup process, regardless of where they play.
The solution lies in creating clearly defined, accessible storage in the child’s primary play area. Research confirms this approach; data from early childhood development centers shows that 73% of children ages 3-5 maintain tidier spaces when their toys have designated, easily accessible homes. This is where the concept of a “home base” for toys becomes critical. Whether it’s a specific shelf in the living room or a designated corner of the playroom, what matters is that the system is simple, visible, and manageable for a small child. The focus shifts from exiling play to a separate room to integrating it thoughtfully into family life.
Case Study: The 5-Minute Reset Ritual Success
One family struggled with constant toy clutter spread throughout their open-plan living area. Instead of moving the play zone, they implemented a “5-minute family reset” every evening before dinner. Everyone, including their 3-year-old, was responsible for tidying their designated zones for just five minutes. After 30 days, the family reported a staggering 70% reduction in visible toy clutter and, more importantly, a significant increase in their child’s willing participation in household tidying. The key was not the location of the toys, but making the cleanup process predictable, short, and a collective effort, transforming a chore into a shared family ritual.
The “Beige Room” mistake: When style prevents a child from feeling at home
In the age of curated social media feeds, the trend towards minimalist, monochrome “sad beige” children’s rooms is pervasive. While aesthetically pleasing to adults, these overly stylized spaces can inadvertently send a discouraging message to a child: this room is for looking at, not for living in. When a room’s design is too precious, it can inhibit a child’s natural inclination to explore, create, and even make a mess. It can prevent them from feeling a true sense of ownership and comfort in their own space. A room that belongs to a child should reflect that child’s vibrant, developing personality.
This doesn’t mean sacrificing style for chaos. The goal is to find a balance where the parent’s design sensibility creates a calm, organized backdrop, and the child’s contributions provide the life and color. As Maria Montessori wisely stated:
The environment must be rich in motives which lend interest to activity and invite the child to conduct his own experiences.
– Maria Montessori, The Absorbent Mind
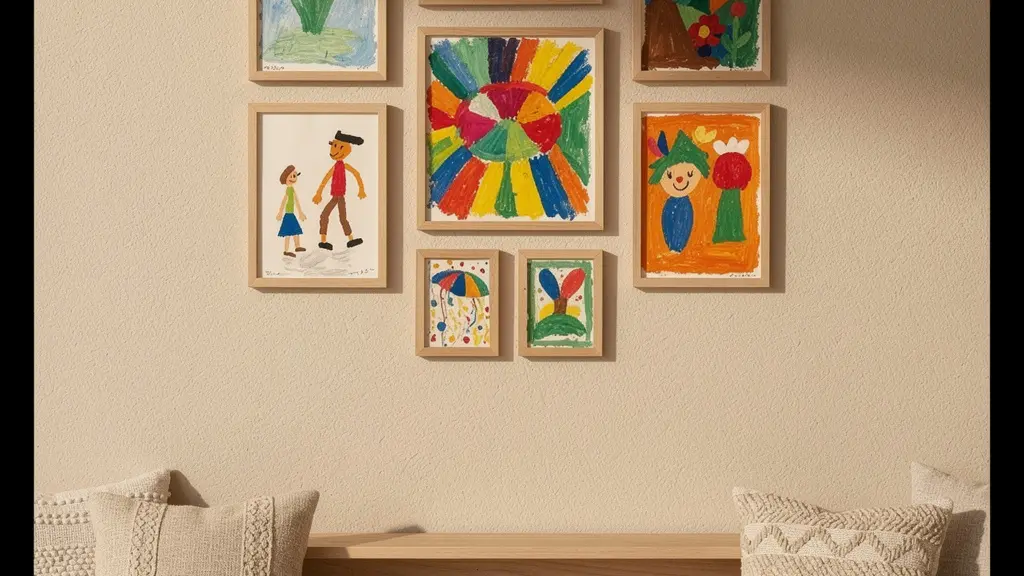
A room “rich in motives” is one that values the child’s work. The most effective way to achieve this is by dedicating prominent, respectful space for displaying their creations. A gallery wall of their artwork, a special shelf for their block creations, or a corkboard for their treasures turns the room from a static showroom into a living gallery of their identity.
How to use lighting to calm a chaotic household in the evening?
The transition from the high energy of daytime play to the calm of bedtime is often a source of household friction. We typically rely on verbal cues—”It’s time to quiet down!”—that fight against a brightly lit environment that screams “play time!” A more effective approach is to use lighting as an environmental cue to signal this shift. Just as the sun sets in nature, gradually dimming and warming the light in your home can naturally influence your family’s energy levels, making the wind-down process intuitive rather than a battle of wills.
Implementing a “smart sunset” is a powerful, non-verbal way to manage the evening routine. This involves strategically shifting the color temperature and brightness of your home’s lighting. A family with young children reported that implementing automated warm lighting transitions reduced bedtime resistance by 60%. By programming smart bulbs to gradually shift from bright, cool tones to dim, warm amber tones, they found their children naturally gravitated toward quieter activities in designated “calm zones” illuminated by soft lamps. The lighting, not the parents, became the primary signal that the day was drawing to a close. This “choreographed” transition helps regulate the body’s natural circadian rhythms and eases the entire family into a more peaceful state.
A simple schedule could look like this:
- 6:00 PM: Main overhead lights switch from a cool white to a warmer tone (around 3000K).
- 6:30 PM: Main lights dim to 75% brightness, and you activate secondary, warmer table lamps in reading or puzzle areas.
- 7:00 PM: The environment gets warmer, dimming to 50% and shifting to a cozy amber tone (2700K).
- 7:30 PM: Create “pools of light” by turning off overheads completely, relying only on task lamps for specific, quiet activities like reading a book.
- 8:00 PM: The final transition to only essential night lights, signaling that the house is “going to sleep.”
How to create a damage-proof art corner in a rental property?
Encouraging creativity while living in a rental can feel like a contradiction. The fear of stained carpets, marked-up walls, and a lost security deposit can lead parents to restrict art activities altogether. However, with smart planning, you can create a fully functional, “damage-proof” art corner that allows for creative freedom without risking your lease. The key is to shift the focus from restricting the materials to containing the mess within a designated, protected, and mobile system. This empowers the child to be creative while giving the parent peace of mind.
The foundation of a rental-friendly art corner is a large vinyl splat mat. This defines the “art zone” and protects the floor. For the walls, instead of paint, consider a large, self-adhesive chalkboard or whiteboard decal, or simply tape a large roll of paper to a window for a beautiful, light-filled painting experience. The second crucial element is a portable art caddy. Stock this caddy *only* with washable, rental-friendly materials: washable markers, water-based paints, and wipeable crayons. The rule is simple and clear: art supplies live in the caddy, and the caddy can only be used on the splat mat. This system is not only safe for your rental but also teaches the child about preparation and cleanup as part of the creative process.
| Solution | Cost Range | Setup Time | Damage Risk | Effectiveness |
|---|---|---|---|---|
| Large Vinyl Splat Mat | $15-30 | 2 minutes | Zero | Protects 6×4 ft area |
| Window Paper Taping | $5-10 | 5 minutes | Zero | Easy cleanup, natural light |
| Standing Acrylic Easel | $40-60 | 10 minutes | Zero | Reusable, portable |
| Leaning Whiteboard | $25-40 | None | Zero | Infinite reuse, no mounting |
| Portable Art Caddy | $20-35 | None | Zero | Contains supplies, mobile |
Key Takeaways
- Your home’s physical environment is a “silent instructor” that can teach independence more effectively than words.
- True tidiness comes from simple, accessible systems, not from relegating play to a separate room.
- Balance adult aesthetics with a child’s need for expression by proudly displaying their artwork and creations.
How to anchor heavy dressers in a rental without losing your deposit?
Furniture tip-overs are a silent but serious danger in any home with young children. The urge to climb is a natural part of development, making heavy items like dressers and bookshelves a significant hazard. In fact, according to consumer safety data, 71% of furniture tip-over incidents involve children under six years old. While traditional furniture anchors require drilling into walls—a non-starter for most renters—several effective no-drill solutions can secure your furniture and your security deposit.
The most reliable no-drill options use high-strength adhesives, like 3M VHB tape, combined with furniture straps. These products create an incredibly strong bond between the furniture and the wall without a single screw. The key to their effectiveness is meticulous preparation and patience. The surfaces must be perfectly clean, and the adhesive needs time to cure—typically 24 hours—before it can withstand force. While powerful, these adhesives can be removed without a trace. The trick is to use gentle heat from a hairdryer to soften the glue, followed by slowly “sawing” through the adhesive with a piece of dental floss. This allows renters to meet the highest safety standards without sacrificing their deposit, creating a space that is safe for exploration.
Follow these steps for a secure, damage-free installation:
- Thoroughly clean both the wall surface and the back of the furniture with isopropyl alcohol to remove any dust or grease.
- Apply the adhesive pads (often using strong 3M VHB tape) to the furniture strap brackets, pressing firmly for at least 30 seconds to ensure a good bond.
- Adhere the brackets to the furniture and the wall, and wait a full 24 hours for the adhesive to cure before attaching the strap and applying any tension.
- For removal, warm the adhesive pad with a hairdryer on a low setting for 2-3 minutes to soften the glue.
- Gently work a piece of dental floss or fishing line behind the pad in a sawing motion to slice through the softened adhesive, then clean any remaining residue with a citrus-based cleaner.
How to Help Toddlers Stay Safe Around Stairs and Heavy Furniture?
When faced with the dangers of stairs and heavy furniture, our first instinct as parents is to restrict. We install baby gates, lock cabinets, and say “no” a hundred times a day. While these measures are born from love and a desire to protect, a strategy based solely on restriction can inadvertently teach helplessness. It sends the message that the world is full of dangers they cannot handle. A more empowering, and ultimately safer, approach is to balance restriction with education. The goal is not just to prevent accidents but to build designed competence—creating a safe environment where children can learn the skills to navigate their world confidently.

Instead of only blocking stairs, we should also actively teach stair competence: practicing going up on all fours and, crucially, coming down backwards, feet-first. Instead of forbidding all climbing, we can provide a safe alternative like a small Pikler triangle on a soft mat. This redirects their natural developmental urge to a safe and appropriate outlet. This approach of teaching skills is remarkably effective. Studies have shown that families who actively taught stair navigation skills reported 80% fewer stair-related incidents compared to families who relied solely on gates. By trusting our children and providing them with the tools and practice to develop new skills, we are not just making them safer in the short term; we are equipping them with the confidence and physical literacy to be safe for a lifetime.
Ultimately, creating a home that promotes independence is an act of trust. It is the belief that our children are capable and that our role is to provide the scaffolding they need to build their own competence. So, start today. Choose one area—the coat hooks, the toy shelf, the art corner—and transform it from a point of parental management into a launchpad for your child’s independence. The result will be a calmer home and, more importantly, a more confident and capable child.